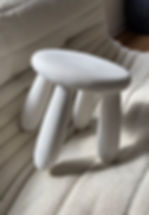
ikea flip MAMMUT plaster stool
- L-C
- Apr 15, 2022
- 2 min read
just an easy peasy way to elevate that little plastic thing into a textured fun little side table


Need
one Ikea mammut stool
plaster
fabric tape
gloves
surface protection
little container to mix the plaster in
sand paper

build your stool, wich is basically just popping the legs into place

get your tape and try to cover as much surface of the stool as possible without creating crazy bulky folds of the tape

I started with the top and tried to wrap the end bits around the curved edge

you can stretch the tape a bit to follow the curve of the stool

then cover the legs as well
(tbh I was a bit lazy and thought a bit would be enough and do the job, but now after struggling: would have been better to cover the whole leg)

mix your plaster following the instructions on the packaging. usually its kinda fat curing. so I would recommend to mix just a small batch at a time ans use it all up before you mix up a new batch.
usually you have around 10-15 minutes before its kinda too hard to work with it

I started with covering the whole top in a super thick layer, you can flip the whole thing and start with the legs first if you don't wanna be stuck under there when covering the legs

I basically dumped my whole mix on and started smearing it around to cover the whole top with the sides

at some places the tape lifted a bit, don't worry if thats happening with you, you can cover it up in a second layer or just remove the bits sticking out with sand paper once its dry

then I started covering the legs
I did several thin layers and let it cure in between
you can do one super thick layer, I just wanted to make sure to keep the shape of the legs ans not to add super much on one spot and make it look super wobbly and lumpy

once the whole thing is covered let it dry for at least 24 hours

once dry you can start sanding the whole thing down
if you like the texture, leave as much as you like
I went with a pretty smooth top and a bit textured legs, kinda to make it look like its made from stone

this was before sanding

thats after
you can add another layer of plaster on top of cured, if you decide to add some on certain places


